Every Minute Counts After a Pipe Burst
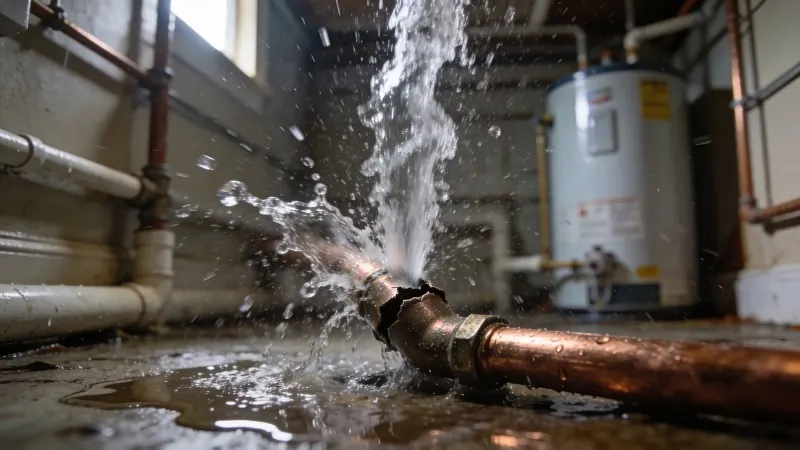
It was 2 AM on a January morning in a suburb outside Chicago. The homeowner woke up to the sound of water hitting hardwood -- not a drip, but a steady stream. A copper supply line in the second-floor bathroom wall had split along a six-inch seam.
By the time he found the main shut-off valve in the basement, water had been running for nearly 40 minutes. The second floor bathroom, the hallway, and the living room ceiling below were all saturated.
We see burst pipe water damage like this every winter. And every year, we see homeowners make the same mistakes -- not knowing where the shut-off is, trying to mop up thousands of gallons with bath towels, waiting until morning to call for help. The pipe doesn't care what time it is. Neither does the water.
A burst pipe can release between 5 and 10 gallons per minute through a half-inch supply line. That's 400-600 gallons per hour, enough to flood an entire floor in under two hours. In 15 years of restoration work, we've responded to pipe bursts that caused $3,000 in damage and pipe bursts that caused $45,000 in damage. The difference almost always comes down to how fast the water was stopped and how quickly professional extraction began.
This guide covers everything you need to know about burst pipe water damage -- why pipes fail, which pipe materials are most vulnerable, how to prevent frozen pipe bursts, what to do in the first minutes after a burst, and how professional restoration works from extraction through rebuild. If you're dealing with a burst pipe right now, skip the reading and call (844) 426-5801. Our crew is on the way in under 60 minutes, 24/7.
Why Pipes Burst: Failure Modes by Material
Not all pipe bursts are the same. The type of pipe in your home, its age, and the conditions it's exposed to determine how and why it fails. Understanding this matters because it affects the type of damage, the urgency of the situation, and what your plumber will need to address after restoration.
Copper pipes
Copper has been the standard residential plumbing material since the 1960s. It's durable, corrosion-resistant in most water conditions, and can last 50-70 years. But copper isn't invincible. The three main failure modes:
- Pinhole leaks -- aggressive water chemistry (low pH or high dissolved oxygen) eats through copper from the inside out. First sign: a wet spot on a wall, or green patina stains.
- Freeze-related splits -- copper is rigid. When water freezes inside, it expands and creates pressure. Copper doesn't flex, it cracks. We typically see clean splits 2-8 inches long in uninsulated exterior walls and attics.
- Joint failure -- solder connections weaken over time from temperature changes, water hammer vibration, and pipe movement. Especially common in pre-1986 homes with lead solder.
CPVC pipes
CPVC was popular from the 1980s through the 2000s. Cheaper than copper and easier to install. The problem: CPVC becomes brittle with age. What accelerates the embrittlement:
- Temperature cycling
- Chemical exposure from certain pipe hangers and insulation adhesives
- UV degradation (even brief sunlight exposure during construction)
We've responded to hundreds of CPVC failures in homes built between 1985 and 2005. The pattern is consistent: a pipe that's been fine for 20-30 years suddenly cracks at a fitting, with no warning. CPVC failures tend to be catastrophic -- a complete fracture, not a slow leak. We've seen fittings crack from something as minor as bumping the pipe in a utility closet.
A real example from our work: A homeowner in Dallas called us after a CPVC hot water line cracked at a 90-degree elbow in a second-floor laundry closet. She was at work when it happened. By the time she came home eight hours later, the water had run continuously. The entire second floor was flooded. Water had come through the first-floor ceiling in three rooms. Total restoration cost was over $18,000. The pipe itself looked fine from the outside -- the crack was on the underside of the fitting, barely an inch long. But at 40 PSI of water pressure, an inch is enough to release thousands of gallons.
Galvanized steel pipes
If your home was built before 1970, there's a good chance it still has galvanized steel supply lines. Key facts:
- Pipes corrode from the inside -- rust builds up layer by layer
- Flow decreases as walls weaken over time
- Failures look different: corroded holes that grow slowly, not clean splits
- Water may be rusty or discolored
- By the time it bursts, it's usually been failing for years
- Best prevention: Proactive repipe to copper or PEX ($4,000-$10,000 for a typical home)
PEX pipes
PEX is the most common plumbing material in new construction today. Its key advantage is flexibility -- it can stretch up to 1.5 times its normal diameter before failing in freeze conditions. Copper can't do that.
PEX isn't immune to problems though:
- Fittings (brass crimp or expansion) can fail
- UV light degrades the material, even short-term exposure
- Rodents chew through PEX lines in crawl spaces and attics
But as a material, PEX is the most burst-resistant option. If you're repiping a home, PEX with quality fittings is what we recommend.
Frozen Pipe Bursts: Why They Happen and Where to Look
Frozen pipes are the leading cause of burst pipe water damage in the United States during winter months. According to the Insurance Information Institute, frozen pipe claims average over $10,000 per incident, and they're almost entirely preventable.
The physics of a frozen pipe burst
Here's something most people get wrong: the pipe doesn't burst at the point where it freezes. The burst happens between the ice blockage and a closed fixture downstream.
When water freezes inside a pipe, it expands by about 9% in volume. That expansion creates an ice plug. Water trapped between the ice plug and the nearest closed faucet or valve has nowhere to go. As more ice forms, pressure in that trapped section increases, sometimes to several hundred PSI. The pipe wall can't handle that pressure, and it ruptures.
This is why the burst often occurs in a section of pipe that never actually froze. The ice forms in the exposed exterior wall section, but the split happens three feet away in a section that runs through interior space. Understanding this helps explain why damage sometimes shows up in unexpected locations.
High-risk locations in your home
After 15 years of restoring homes from frozen pipe bursts, we know exactly where to look. These locations fail first, every winter:
- Exterior walls -- especially north-facing walls with minimal insulation. Pipes between the insulation and exterior sheathing are in the worst possible position.
- Unheated garages -- supply lines in garage walls are exposed to near-outdoor temps. Water heaters with exposed supply lines are a common failure point.
- Attics and crawl spaces -- pipes directly exposed to outdoor air. We've seen PEX lines freeze on the first hard freeze because the builder ran them above the insulation.
- Hose bibs and outdoor faucets -- even frost-proof bibs freeze if a hose is left attached, trapping water that freezes backward into the wall.
- Rim joist area -- where the floor framing meets the foundation wall. One of the least insulated areas in most homes.
Winter-specific prevention that actually works
We tell every customer the same thing: preventing a frozen pipe burst costs almost nothing compared to restoring one. Here's what works, based on what we see in the field.
Insulate every exposed pipe. Foam pipe insulation (less than a dollar per foot at any hardware store) reduces heat loss and slows freezing. For pipes in the most exposed locations -- attics, crawl spaces, garages -- use heat cable with a built-in thermostat. Heat cable wraps around the pipe and provides low-level electric heat when temps drop. It costs $15-$50 per section.
Keep your thermostat at 55 degrees Fahrenheit or above. This applies even when you're away from home. We respond to more frozen pipe bursts in vacant and vacation homes than anywhere else. The homeowner turns the heat down to save money while traveling, the temperature drops, and pipes in exterior walls or near the rim joist freeze. The insurance claim costs ten times more than the heating bill would have.
Open cabinet doors on exterior walls. On nights when temperatures drop below 20 degrees Fahrenheit, open the cabinet doors under kitchen and bathroom sinks that sit on exterior walls. This allows heated air from the room to circulate around the pipes.
Let faucets drip. A slight, steady drip from faucets on vulnerable lines keeps water moving. Moving water resists freezing. You don't need a heavy flow -- a slow drip is enough.
Disconnect outdoor hoses before first freeze. Remove all garden hoses from hose bibs. Even frost-proof bibs will freeze if a hose traps water inside the valve body. After disconnecting, open the bib to let residual water drain.
Seal air leaks around pipes. Use caulk or expanding foam to seal any gaps where pipes penetrate exterior walls, rim joists, or the foundation. Cold air infiltration around pipes is a primary cause of localized freezing.
Know your shut-off valve location. This isn't prevention; it's damage limitation. But every member of your household should know where the main water shut-off valve is and how to operate it. When a pipe bursts at 3 AM, fumbling with a flashlight looking for a valve you've never turned wastes critical minutes. Walk everyone in the house through it before winter hits.
Emergency Shut-Off Procedures: The First 5 Minutes
The first five minutes after a pipe burst determine whether you're looking at a $3,000 restoration or a $15,000 restoration. This isn't an exaggeration; it's what we see on job after job. Here's exactly what to do, in order.
Step 1: Shut off the main water supply
Find your main shut-off valve and turn it clockwise until it stops. Common locations:
- Basement: Near the front foundation wall, close to the water meter
- Crawl space: Near the point where the supply line enters the foundation
- Utility closet or mechanical room: Near the water heater or pressure regulator
- Exterior: At the meter box near the street (may require a meter key)
If the valve is a gate valve (round handle you turn), turn it clockwise several full turns until it stops. If it's a ball valve (lever handle), turn it 90 degrees so the handle is perpendicular to the pipe.
If the valve is stuck or won't turn, don't force it with a wrench -- old gate valves can snap. Call your water utility company and ask them to shut off water at the street.
Step 2: Turn off electricity to affected areas
Water and electricity together can kill. Go to your breaker panel and shut off all circuits serving rooms where water is present or spreading. If you're not sure which circuits control which areas, shut off the main breaker.
Don't step through standing water to reach your breaker panel. If the panel is in a flooded area, call your utility company or an electrician. This isn't the time to take risks.
Step 3: Open faucets to drain remaining pressure
After the main valve is closed, open cold water faucets at the lowest point in your home. This drains the remaining water from the supply lines and reduces the volume still flowing from the break. Flush toilets as well -- each tank holds 1.6 to 3.5 gallons that will otherwise add to the flooding if the supply line feeds through the affected area.
Step 4: Document everything
Before you move anything, pick up your phone and take photos and video. Walk through every affected area. Photograph the burst pipe location (if visible), standing water depth, wet walls, wet ceilings, damaged flooring, and any affected belongings.
Your insurance adjuster will need this. Our team documents everything when we arrive, but having your own early photos strengthens your claim. For detailed guidance on the claims process, see our water damage insurance claim guide.
Step 5: Call (844) 426-5801
Our emergency crew dispatches within minutes of your call. We arrive within 60 minutes, 24/7, including holidays, weekends, and 3 AM calls. Extraction starts the moment we arrive.
Don't wait until morning. Don't try to handle it with a shop vac and towels. A half-inch supply line at normal residential pressure (40-80 PSI) releases 400-600 gallons per hour. Your shop vac holds six gallons.
Step 6: Protect what you can while waiting
Move electronics, documents, photo albums, and irreplaceable items to dry areas. Lift furniture off wet carpet -- put aluminum foil or plastic wrap under wooden furniture legs to prevent finish transfer and staining.
If water is dripping through a ceiling, place buckets to catch it and poke a small hole at the lowest point of the sag to allow controlled drainage. This prevents the weight of collected water from collapsing the drywall. We cover ceiling water damage assessment and repair in detail on our dedicated page.
A story from the field
A retired couple in Denver called us on a Sunday night in February. A copper supply line had burst in their attic where it ran to a second-floor bathroom -- the section above the insulation line, completely exposed to attic air that was well below zero. The wife knew exactly where the shut-off was and had it closed within three minutes.
That fast response limited the water release to approximately 30 gallons. We extracted, dried the ceiling cavity, and the total restoration cost was under $2,500.
Compare that to a similar burst we responded to two weeks later. Same city, same type of pipe failure, but the homeowner didn't know where the shut-off was. He spent 25 minutes looking for it. The water released over 250 additional gallons in that time. His restoration cost exceeded $12,000. Same pipe failure -- different outcome entirely based on shut-off response time.
Burst Pipe Emergency?
Our IICRC-certified crew arrives within 60 minutes with truck-mounted extraction equipment.
📞 Call (844) 426-5801Pipe Materials and Common Failure Scenarios
Understanding what type of plumbing runs through your home helps you assess risk and make informed decisions about prevention. Here's a quick comparison:
| Material | Era | Lifespan | Burst Risk | Top Failure Mode |
|---|---|---|---|---|
| Copper | 1960s-present | 50-70 yrs | Moderate | Pinhole leaks, freeze splits |
| CPVC | 1980s-2000s | 20-35 yrs | High | Brittle cracking at fittings |
| Galvanized steel | Pre-1970 | 40-50 yrs | Variable | Internal corrosion and perforation |
| PEX | 1990s-present | 40-50+ yrs | Low | Fitting failure, UV/rodent damage |
| Polybutylene | 1978-1995 | N/A (discontinued) | High | Chlorine degradation, micro-fractures |
Copper (1960s-present)
- Lifespan: 50-70 years
- Failure mode: Pinhole leaks from corrosive water chemistry; freeze splits in uninsulated runs; solder joint failure at connections
- Warning signs: Green stains on pipe surface (patina), small wet spots that appear and disappear, unexplained dampness in wall cavities
- Burst severity: Moderate. Pinhole leaks are slow but damaging over time. Freeze splits release full line pressure and can be catastrophic.
- Prevention priority: Insulate all exposed runs; test water pH if you notice green patina; have a plumber inspect solder joints in homes over 30 years old
CPVC (1980s-2000s)
- Lifespan: 20-35 years (varies significantly by installation quality and chemical exposure)
- Failure mode: Embrittlement and cracking at fittings and elbows; chemical degradation from incompatible insulation adhesives and pest control sprays
- Warning signs: Hairline cracks visible at fittings; discolored or yellowed pipe; any pipe that "clicks" or sounds hollow when tapped
- Burst severity: High. CPVC failures tend to be sudden and complete -- a fitting separates entirely, and full-pressure water flows uncontrolled.
- Prevention priority: If your home has CPVC plumbing installed before 2005, have a plumber inspect fittings annually. Consider proactive repipe to PEX -- the cost is far less than one catastrophic CPVC failure.
Galvanized steel (pre-1970)
- Lifespan: 40-50 years (most are well past this)
- Failure mode: Internal corrosion restricts flow, weakens pipe walls, eventual perforation or burst
- Warning signs: Rusty or brown water when you first turn on a faucet; low water pressure throughout the house; visible rust and flaking on exposed pipe surfaces
- Burst severity: Variable. Some galvanized failures are slow leaks at corroded joints. Others are sudden bursts when a thinned wall section gives way under pressure.
- Prevention priority: If you still have galvanized supply lines, the only real prevention is replacing them. This isn't a question of if they will fail, but when.
PEX (1990s-present, dominant since 2010)
- Lifespan: 40-50+ years (still a relatively new material; long-term data is still developing)
- Failure mode: Fitting failure (brass crimp or expansion fittings); UV degradation if exposed to sunlight; rodent damage; manufacturer defects in early production runs
- Warning signs: Moisture around fittings (especially in manifold areas); discolored or chalky-looking pipe sections (UV damage); visible teeth marks from rodents
- Burst severity: Low to moderate at pipe sections (PEX flexes rather than cracking in most freeze events). Fitting failures can release full line pressure.
- Prevention priority: Protect from UV exposure; inspect manifold and fitting areas annually; address rodent issues in crawl spaces and attics promptly
Polybutylene (1978-1995)
If your home was built between 1978 and 1995, it may have polybutylene (PB) pipes -- typically gray, white, or blue flexible tubing. Key concerns:
- No longer manufactured for plumbing -- degrades when exposed to chlorine in municipal water
- Develops micro-fractures from the inside, leading to sudden failures
- Insurance companies are increasingly reluctant to cover homes with PB plumbing
- If you've got it, replacement is strongly recommended
We still respond to polybutylene failures regularly. Homeowners are often surprised to learn their pipe material was discontinued for cause.
What Burst Pipe Water Damage Actually Looks Like
Homeowners often underestimate burst pipe damage because much of it is hidden. The water you see on the floor is only part of the problem. Here's what actually happens inside your walls, floors, and ceilings when a pipe bursts.
Behind the walls
When a pipe bursts inside a wall cavity, here's what happens:
- Water fills the cavity, saturating insulation and soaking studs
- Fiberglass insulation absorbs water like a sponge -- it won't dry on its own
- If insulation stays wet 48+ hours, it becomes a mold incubation chamber
- Drywall wicks water upward 18-24 inches above the visible water line
- That's why we cut drywall higher than the apparent stain
For more on hidden water damage in walls, see our water damage behind walls guide.
Under the floors
Water flows to the lowest point. In a burst pipe event:
- It runs along the subfloor and pools in low spots
- It seeps through seams between subfloor panels
- In hardwood/laminate homes, it wicks along tongue-and-groove joints 3-4 feet beyond the visible wet area
- Carpet pad can be completely waterlogged while the carpet surface feels only slightly damp
Don't assume a fan will dry it. The pad and subfloor below are holding gallons of water.
Through the ceiling
If the burst pipe's on an upper floor, gravity pulls water onto the ceiling below. Key facts:
- Drywall ceilings hold water like a shallow tray
- A saturated 4x8 sheet of half-inch drywall can hold 40-50 pounds of water
- Multiple saturated sheets can collapse without warning
- If you see a bulge or sag, stay out from under it
Controlled drainage -- poking a small hole at the lowest point and catching water in a bucket -- is the safest approach before our crew arrives.
The Burst Pipe Restoration Process
Professional burst pipe water damage cleanup follows a documented sequence designed to remove water, dry the structure, prevent mold, and restore damaged materials. Here's what happens when our crew arrives.
Phase 1: Assessment and extraction (Day 1)
Our technicians start with thermal imaging cameras to map the full extent of water intrusion, including areas that look dry on the surface. Then extraction begins immediately:
- Standing water: Truck-mounted units remove water at 500+ gallons per hour
- Carpet and pad: Portable weighted extractors pull water from fibers and backing
- Saturated pad: Pulled back and removed -- replacement is usually more practical than drying
- Drywall: Cut to 24 inches above the highest visible water mark (flood cut)
- Wet insulation: Removed entirely -- fiberglass batts can't be dried in place
The flood cut sounds aggressive, but there's a reason for it. Drywall below the cut line can't be dried effectively in place and will grow mold if left in. Removing the lower portion also opens the wall cavity for drying.
Phase 2: Structural drying (Days 2-5)
After extraction and demolition, we set up the drying equipment. For a typical burst pipe affecting 2-3 rooms, that means:
- 4-8 high-velocity air movers positioned to create airflow across wet surfaces and through open wall cavities
- 1-2 LGR (Low Grain Refrigerant) dehumidifiers that pull 15-20 gallons of moisture per day from the air
- Injectidry wall drying systems when closed cavities can't be opened -- these inject dry air directly into the wall cavity through small holes
For more about the science and equipment behind structural drying, see our structural drying page.
We take moisture readings daily. Wood framing needs to reach a moisture content below 16%. Concrete slabs need to reach equilibrium with ambient conditions. Drywall remnants above the flood cut need to read at or below reference readings from unaffected areas. Each reading is documented -- date, location, measurement -- for your insurance file.
Drying typically takes 3-5 days for standard wood-framed construction after a pipe burst. Concrete and masonry can take longer. We follow ANSI/IICRC S500 standards for water damage restoration, which means we don't pull equipment based on schedule -- we pull equipment based on moisture readings. The structure is dry when the numbers say it's dry, not when the calendar says it should be.
Phase 3: Antimicrobial treatment
After the structure reaches dry standard, we apply antimicrobial agents to framing, subfloor, and any remaining building materials that were exposed to water. This provides a protective barrier against mold colonization during the rebuild phase and beyond. Antimicrobial treatment is standard protocol on every pipe burst restoration, even when there's no visible mold. Mold prevention is far less expensive than mold remediation after the fact.
Phase 4: Rebuild and restoration (Weeks 2-4)
With the structure verified dry and treated, rebuild begins. This typically includes:
- New insulation in affected wall cavities
- New drywall to replace flood-cut sections
- Taping, mudding, and painting
- Baseboard and trim replacement
- Carpet pad replacement and carpet reinstallation (or new carpet if the original was unsalvageable)
- Hardwood floor assessment -- minor cupping may be correctable through sanding after the wood acclimatizes; severe cupping or buckling requires replacement
Every phase is photographed and documented. Your insurance company receives a complete record -- timestamped photos, daily moisture readings, equipment placement logs, scope of work, and final verification readings.
Burst Pipe Damage Cost: What to Expect
For detailed pricing by damage type and severity, see our water damage restoration cost guide. Here are the ranges specific to burst pipe water damage:
| Severity | Cost Range | Typical Scenario |
|---|---|---|
| Minor (1 room) | $1,500-$3,500 | Caught within 1 hour, limited spread |
| Moderate (2-3 rooms) | $3,500-$7,500 | Water ran a few hours, flood cuts needed |
| Major (multi-room/story) | $7,500-$20,000+ | Overnight or extended run, full rebuild |
| Add mold complication | +$1,500-$5,000+ | Water sat 48+ hours before extraction |
Minor burst caught quickly (1 room, limited spread): Caught within the first hour. Limited water reached the floor. Drywall repair and paint only.
Moderate burst (2-3 rooms, floor and wall damage): The most common scenario we see. A pipe burst behind a wall, water ran for a few hours before discovery. Flood cuts in 2-3 rooms, carpet pad replacement, 3-5 days of drying.
Major burst (multi-room or multi-story): A supply line failure that ran for many hours, overnight, or while the homeowner was away. Extensive demolition, multiple dehumidifiers, possible ceiling damage on the floor below, and full rebuild required.
With mold complication: If water sat for more than 48 hours before extraction, or if hidden moisture wasn't identified and addressed, mold remediation may be necessary. This adds containment, HEPA filtration, antimicrobial treatment, and post-remediation testing to the scope.
Insurance coverage for burst pipes
Burst pipe water damage is one of the most clearly covered events under standard homeowners insurance. Your HO-3 policy covers "sudden and accidental" water damage.
| Typically Covered | Typically NOT Covered |
|---|---|
| Emergency water extraction | The pipe repair itself (that's maintenance) |
| Structural drying equipment and monitoring | Damage from a leak you knew about and ignored |
| Demolition of damaged materials | Frozen pipes in unoccupied homes where heat was turned off |
| Rebuild and replacement | Gradual damage from deferred maintenance |
| Content cleaning or replacement | |
| Additional living expenses (ALE) |
We handle insurance claims on burst pipe restorations daily. Our documentation meets every requirement your adjuster will have. We bill your carrier directly -- in most cases, you'll pay only your deductible.
When a Burst Pipe Is More Than Water Damage
Some burst pipe situations involve complications that go beyond standard water damage restoration. Knowing what to watch for helps you and your restoration team address everything.
Category 2 and Category 3 water
A burst supply line delivers Category 1 water -- clean, potable water from the municipal supply or well. This is the simplest scenario for restoration because the water itself isn't a health hazard.
But not all pipe bursts are supply lines. A cracked drain pipe or broken waste line introduces Category 2 (gray water) or Category 3 (black water). Category 2 and 3 events require upgraded PPE for the crew, antimicrobial treatment of all contacted surfaces, removal of all porous materials, and significantly higher cost and scope.
For sewage-specific situations, our sewage backup cleanup page covers the protocols in detail.
Electrical system concerns
Water from a burst pipe can reach electrical outlets and junction boxes, wiring runs inside wall cavities, and your breaker panel. Any electrical component exposed to water needs inspection by a licensed electrician before power is restored. Corroded connections can cause arcing, which is a fire hazard. Our team coordinates electrical inspections as part of the restoration scope.
Hidden damage in unexpected places
Water follows gravity and the path of least resistance, which means it doesn't always end up where you expect it. We've traced water from a second-floor pipe burst through the floor assembly, along a joist bay, and into a first-floor wall 15 feet away from the point directly below the burst. The damage showed up in a bedroom that wasn't under the bathroom at all.
This is exactly why thermal imaging and comprehensive moisture mapping aren't optional. Skipping these steps means missing hidden water that will grow mold in weeks.
Three Real Burst Pipe Scenarios We've Restored
The teacher's frozen pipe in Minnesota
A public school teacher in a Minneapolis suburb left for winter break. She set her thermostat to 50 degrees Fahrenheit to save on heating while she spent two weeks with family out of state. On the third day she was gone, a polar vortex dropped overnight temperatures to minus 22 degrees Fahrenheit. A copper supply line running through the exterior wall of her kitchen -- a north-facing wall with fiberglass insulation that had settled over 30 years, leaving a gap at the top of the cavity -- froze and burst.
The water ran for approximately four days before a neighbor noticed water seeping out under the garage door. By the time we responded, the kitchen, dining room, living room, and a hallway were all affected. The hardwood floors had cupped significantly. Drywall in four rooms required flood cuts.
Restoration took three weeks. Total restoration cost: approximately $22,000. Insurance covered the restoration but denied the hardwood floor claim initially. We provided moisture documentation and cupping measurements showing the subfloor had also warped, and the claim was approved on supplement.
The lesson: 50 degrees isn't warm enough for pipes in poorly insulated exterior walls during extreme cold. The IICRC recommends maintaining a minimum 55 degrees Fahrenheit, and in extreme climates with older construction, 60 degrees is safer.
The CPVC failure in the Texas master bathroom
A homeowner in a 2001-built home in suburban San Antonio was watching TV on a Saturday afternoon when he heard a loud pop from the master bathroom. A CPVC hot water supply line fitting at the angle stop had cracked and separated completely. Hot water at 120 degrees Fahrenheit and full line pressure was spraying into the vanity cabinet and onto the bathroom floor.
He shut off the main water valve within five minutes -- he knew where it was because his home inspector had pointed it out when he bought the house three years earlier. That quick response limited the damage primarily to the master bathroom and the walk-in closet that shared a wall.
We extracted approximately 60 gallons of standing water, removed the vanity cabinet (particle board, which swells and delaminates when wet), performed flood cuts on the bathroom and closet walls, and dried the area in four days. Total restoration cost: approximately $4,800. Insurance covered everything minus the $1,000 deductible.
The lesson: CPVC fittings in homes built in the late 1990s and early 2000s are entering their failure-prone years. The difference between a $4,800 job and a $15,000 job was the homeowner's five-minute shut-off response.
The slow pinhole leak behind the second-floor shower
A couple in an Atlanta-area home noticed a faint musty smell in their first-floor laundry room. There was no visible water, no staining, nothing obvious. The smell persisted for three weeks before they called us.
Using thermal imaging, we found an active temperature anomaly in the shared wall between the laundry room and the garage -- a cold spot consistent with evaporative cooling from moisture. We opened the wall and found a copper supply line with a pinhole leak that had been dripping for what we estimated was six to eight weeks. The leak was slow, probably a few ounces per hour, but over two months, that added up to hundreds of gallons that saturated the wall cavity, spread to the subfloor, and created a mold colony on the backside of the drywall and on three wall studs.
This job required both water damage restoration and mold remediation. Total cost was approximately $8,500 -- significantly more than it'd have been if the leak had been caught in the first week.
The lesson: Not all pipe failures are sudden. Slow leaks behind walls cause some of the worst damage we see because they go undetected for weeks or months. If you notice a musty smell, unexplained dampness, or a gradual increase in your water bill, don't wait. Call for an inspection.
Preventing Burst Pipe Water Damage Year-Round
Winter gets all the attention for pipe burst prevention, and that's warranted -- frozen pipes are the most common burst pipe scenario. The American Red Cross recommends winterizing pipes as part of standard home emergency preparedness, and FEMA includes frozen pipe prevention in its winter storm readiness guidelines. But pipes fail year-round for other reasons, and year-round prevention matters.
Maintenance-based prevention
| Task | Frequency | Why It Matters |
|---|---|---|
| Check water pressure (target 40-80 PSI) | Annually | Pressure over 80 PSI stresses pipes and fittings |
| Address water hammer | As needed | Pressure surges stress pipe joints over time |
| Inspect visible pipes | Annually | Catch corrosion, slow leaks, and brittleness early |
| Service water heater | Annually | Prevents rupture and checks supply line connections |
| Know pipe age and material | Once | Determines your risk level and monitoring needs |
- Water pressure too high? A pressure-reducing valve (PRV) costs $200-$500 and protects your entire system.
- Water hammer? Arrestors cost $10-$30 per fixture.
- Pipe inspection: Look for green staining on copper, white deposits at joints, and brittleness in CPVC or PEX.
- High-risk materials: Homes with galvanized steel, polybutylene, or early CPVC (pre-2000) should be on a heightened monitoring schedule.
Technology-based prevention
| Technology | Cost | What It Does |
|---|---|---|
| Automatic shut-off system (Flo by Moen, Phyn Plus) | $300-$600 + install | Monitors flow, auto-shuts water when it detects a burst |
| Leak sensors | $20-$50 each | Phone alerts when moisture is detected near water sources |
| Smart thermostat with low-temp alerts | Varies | Warns you before indoor temps drop low enough to freeze pipes |
Automatic shut-off systems are the most effective technology. They mount on your main water line and monitor flow patterns continuously. If they detect sustained high flow when no fixtures are in use, they shut off the water supply automatically.
Leak sensors go near water heaters, washing machine lines, under sinks, and in crawl spaces. Smart thermostat alerts are especially valuable for second homes and vacation properties.
Dealing with a Burst Pipe?
IICRC-certified technicians. Thermal imaging. Direct insurance billing. On-site in under 60 minutes.
📞 Call (844) 426-5801Burst Pipe Water Damage FAQ
Burst pipe water damage restoration typically costs $2,500-$7,500 for a standard residential job affecting 2-3 rooms. Minor events caught within the first hour may cost $1,500-$3,000. Major events involving multi-story damage can reach $10,000-$20,000+. Most burst pipe damage is covered by homeowners insurance. We bill your insurance directly.
Yes, in most cases. Standard homeowners insurance (HO-3 policy) covers sudden and accidental water damage from burst pipes. Gradual leaks from deferred maintenance may be denied. We document everything and work with your adjuster to maximize your claim.
Water extraction takes 2-6 hours. Structural drying takes 3-5 days with industrial equipment. Rebuild -- drywall replacement, painting, flooring -- adds 1-3 weeks depending on scope. A typical 2-3 room pipe burst takes approximately 2-4 weeks from emergency response to completion.
Pipes become vulnerable when outside temperatures stay below 20 degrees Fahrenheit (-6 degrees Celsius) for extended periods. Uninsulated pipes in exterior walls, attics, crawl spaces, and garages freeze first. The burst occurs not at the ice point but between the ice blockage and the nearest closed valve, where trapped water pressure builds until the pipe wall fails.
Look for a sudden drop in water pressure, the sound of running water with no fixtures on, wet spots or bubbling paint on walls, warped baseboards, a musty smell, or an unexplained increase in your water bill. Thermal imaging inspection can locate hidden moisture behind walls without cutting into them. Call (844) 426-5801 if you suspect a hidden pipe burst.
Galvanized steel in pre-1970 homes is most failure-prone due to decades of internal corrosion. CPVC in homes built between 1985 and 2005 becomes brittle and cracks at fittings. Copper develops pinhole leaks from aggressive water chemistry. PEX is the most burst-resistant due to its flexibility but can fail at fittings and from UV or rodent damage.
Absolutely, don't wait. A half-inch supply line at residential water pressure releases 400-600 gallons per hour. Every minute of delay means more water flooding your home, more structural damage, and higher restoration costs. Every household member should know where the main shut-off valve is and how to operate it before an emergency happens.
Yes. Mold can start growing within 24-48 hours in warm, dark, moist environments -- the exact conditions inside a wall cavity after a pipe burst. Professional extraction and structural drying within the first 24 hours is the most effective mold prevention. If water sat for more than 48 hours, a mold inspection should be included in the restoration scope.
Insulate exposed pipes with foam insulation or heat cable. Keep your thermostat at 55 degrees Fahrenheit or above, even when away. Open cabinet doors under exterior wall sinks on cold nights. Let vulnerable faucets drip to keep water moving. Disconnect outdoor hoses before the first freeze. Seal air gaps where pipes penetrate exterior walls.
In order: Shut off the main water supply. Turn off electricity to affected areas. Open faucets to drain remaining pressure. Document damage with photos and video. Move valuables to dry areas. Call (844) 426-5801 -- our crew arrives within 60 minutes, 24/7.
Act Now -- Every Minute Counts After a Pipe Burst
The pipe itself will need a plumber. The water damage needs a restoration team that shows up fast. Here's why response time matters:
| Response Time | Typical Cost | Scope |
|---|---|---|
| Under 30 minutes, same-day extraction | $2,500-$5,000 | Standard restoration |
| Overnight or weekend delay | $10,000-$20,000+ | Full restoration + possible mold remediation |
If a pipe's burst in your home, call (844) 426-5801 right now. Here's what you'll get:
- IICRC-certified crew on-site within 60 minutes
- Truck-mounted extraction equipment
- Thermal imaging for hidden moisture detection
- Industrial drying systems
- Complete insurance documentation -- we'll bill your carrier directly
- Available 24/7, 365 days a year
If you're reading this for prevention, take the winter steps seriously. Insulate exposed pipes. Know your shut-off valve. Keep your heat on.
A $50 investment in pipe insulation costs next to nothing compared to a single frozen pipe burst restoration.
Your home's plumbing is hidden behind walls, under floors, and in spaces you rarely check. But every joint and every fitting is a potential failure point. Knowing what you have, maintaining it properly, and knowing what to do if something fails -- that's the difference between a manageable incident and a major project.
Water Damages Pros, 24/7 emergency response, IICRC-certified technicians, direct insurance billing. Call (844) 426-5801.